
Ever flip a switch and swear you could feel a cold draft on a windy, winter's day. You're likely not imagining anything. To be sure, use a candle (carefully) and hold it next to the switch or outlet on exterior walls. If you see the flame blowing away, there's a breeze. Another way I do it is wet my hand. I can feel the cold wind on my hand as you pass over a draft switch plate.

Four switch panel before insulation, with cover removed.
Many of our old homes have had some updated electrical work done, so the old insulation in the walls, if you have any at all, gets compressed and it doesn't take much for cold air to find its way inside through outlets and switches.
So, let's fix it! It's easy, and cost anywhere from $4 to $20 or more depending on how many exterior wall switches and outlets you have in your home. By the way, I recommend you read all of the directions before you start to avoid surprises.
Here is a list of ingredients you'll need:
1) Foam insulation in a can - Great Stuff is, well, great. Note: I found one can will do about 4 to 5 boxes, more if they are all single gang boxes. Have a couple of cans on hand, it beats a second trip to hardware store. Here is a link for Great Stuff
2) Plastic gloves - like doctors wear - you DO NOT want to get Great Stuff on your hands - it's, "not so great." Something like these are so handy around the house.
3) Screwdriver, both phillips and straight edged
4) Hobby razor blade - these are single sided blades like this one
5) Outlet Gaskets - this one works great, but there are others.
Safety First
FIRST AND FOREMOST: Turn off your electricity to the switch or outlets. Since I was doing several areas I just shut off power to whole house for a couple of hours. IF YOU ARE NOT sure about this - hire someone to do this project for you. Better safe than fried.
Next, remove switch plates. This is the plastic cover over the outlet or switch. I use a small dish next to every plate and keep any screws and the plate here, so I can find everything when I'm done.
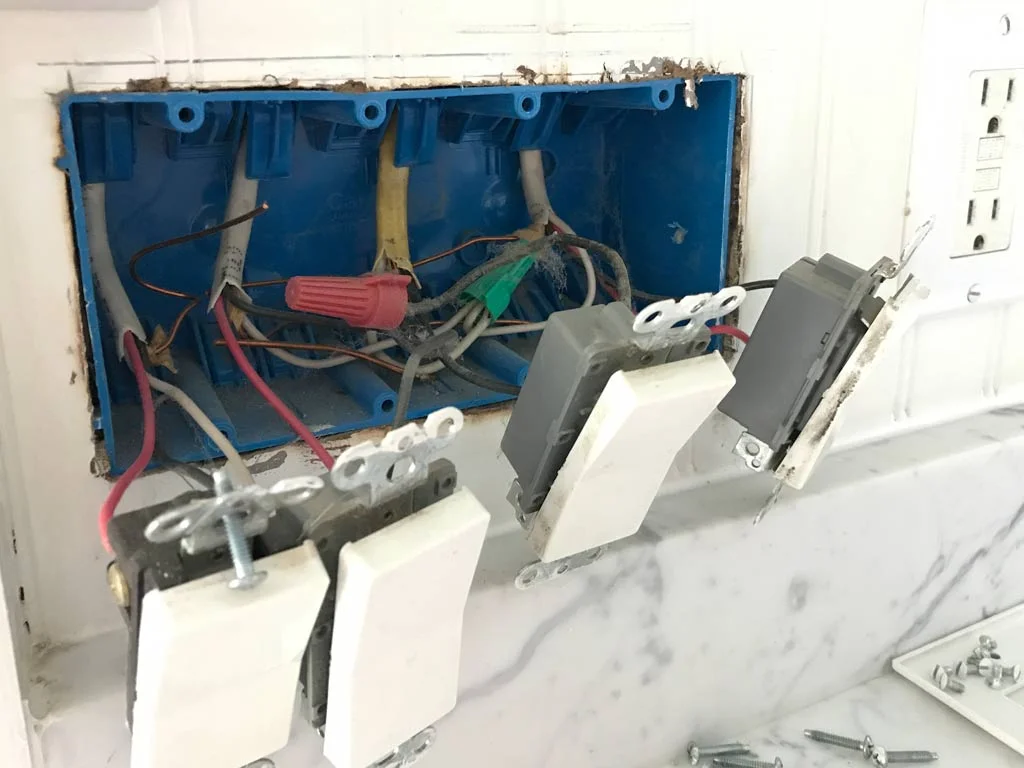
The switches are all removed and gently pulled away from the electrical box. Caution - you MUST turn off electricity before you do this. Zap-o-la awaits if you don't.
Next, remove the outlet or switch. Wait - Is power off? Just checking, because if not, this is where you'll get zapped. I gently pull out the outlet or switch and stretch the wires out of my way. On the 4-switch panel I knew I wanted to add insulation behind it. You can see in this photo the old insulation and it was compressed and mostly non-existent. For my purposes I used insulation foam board with a foil front that I get from Lowe's. This is about 1" thick and I cut it to fit behind the box. I then replaced the box and screwed it back into the studs. Now I'm ready to foam.

I removed the electrical box as I wanted to insulate behind it. The old insulation was mostly compressed and useless, so I added foal wrapped foam sheet insulation behind this box after measuring to see if it would fit.
It's sticky & expands: like, more than you can imagine!
PRO TIP: Have all of your spots ready to go as once you start to foam you'll want to keep going until the can is empty. If you stop to do switches separately the foam dries in the can and you'll clog its little plastic tube. So, I have everything ready to go and then walk from spot to spot inserting foam.
Some things to know about this foam - it expands - a lot. More than you think it will, and it's more than sticky. It will RUIN anything it touches including clothing, walls, carpet - anything. So, keep a paper towel or six with you and wipe it off between outlets. Also, you must shake the can every so often, so hold paper towel on end of plastic tube to keep from flinging a bit of this sticky stuff across the room. And it won't wash off your skin. Literally. So wear gloves. (Ask me how I know this).

I told you it expands a lot. That's okay as we'll carefully cut away excess with single-edged razor blade.
In most electrical boxes there are holes. Simply insert the tube 1/4" into hole and squirt some foam. Next, foam a bit around where the wires come into the box. This stuff is made for this job and will not harm the box or romex wiring. Remember, it will expand more than you think so go easy with it.
Move from one box to the next until finished, and be careful where you set the can down as it will weep that sticky stuff out for another few minutes.
Let it dry, and this will take from 2 to 4 hours. Let it dry completely. It's okay to turn on the electricity while this is drying, BUT, not if you have kids, dogs, etc., around as wires are exposed so be very careful. Remember to turn power back off when you go to next step.
Once dry you can use that razor blade to carefully trim the over-expanded foam away from areas where it will keep you from putting the outlet or switch back in or if it blocks the plastic swtich plate cover.

Here I have carefully foamed around any little hole in box, where wires enter the box, and even gently pried edge of box so it nearly surrounds the box and fills every little hole. The goal is stop the wind from migrating through into your house.
Is your power off? Okay then, gently re-insert the switch or outlet back into the box. Note: Sometimes the wiring can gently accordion fold back in to help fit. If the foam is a bit too thick, pull wiring back out and trim out a bit more. I told you it would expand.

Handy as a pocket on a shirt, these plate gaskets are available from Westlake, Lowe's, Home Depot, Menards, and Amazon. They really help stop the cold and are easy to use with or without spray expanding foam.
Replace the switch or outlet, screw them down carefully. Here is where you can spend a couple more bucks and use these really great plate insulation liners called gaskets. They add one more layer to keep out cold and blowing air. Simply fit over switch or outlet and then replace the plastic plate.
Carefully tighten the screws on your outlet or switch and you're done. You'll be happy with the results because you are cutting down on that cold wind from getting into your expensive heated air.
Have a great winter!